How to backup Supabase
Postgresus supports backups for Supabase PostgreSQL databases. The main requirement is to use an IPv4 address to connect to your Supabase instance.
Connection options
There are two ways to connect Postgresus to your Supabase database:
- Use Session Pooler with IPv4 (Recommended) — Free option available in all Supabase projects
- Purchase IPv4 Add-on — Direct connection option from Supabase
Option 1: Use Session Pooler (Recommended)
The Session Pooler provides an IPv4 address for your Supabase database connection at no additional cost. Here's how to configure it:
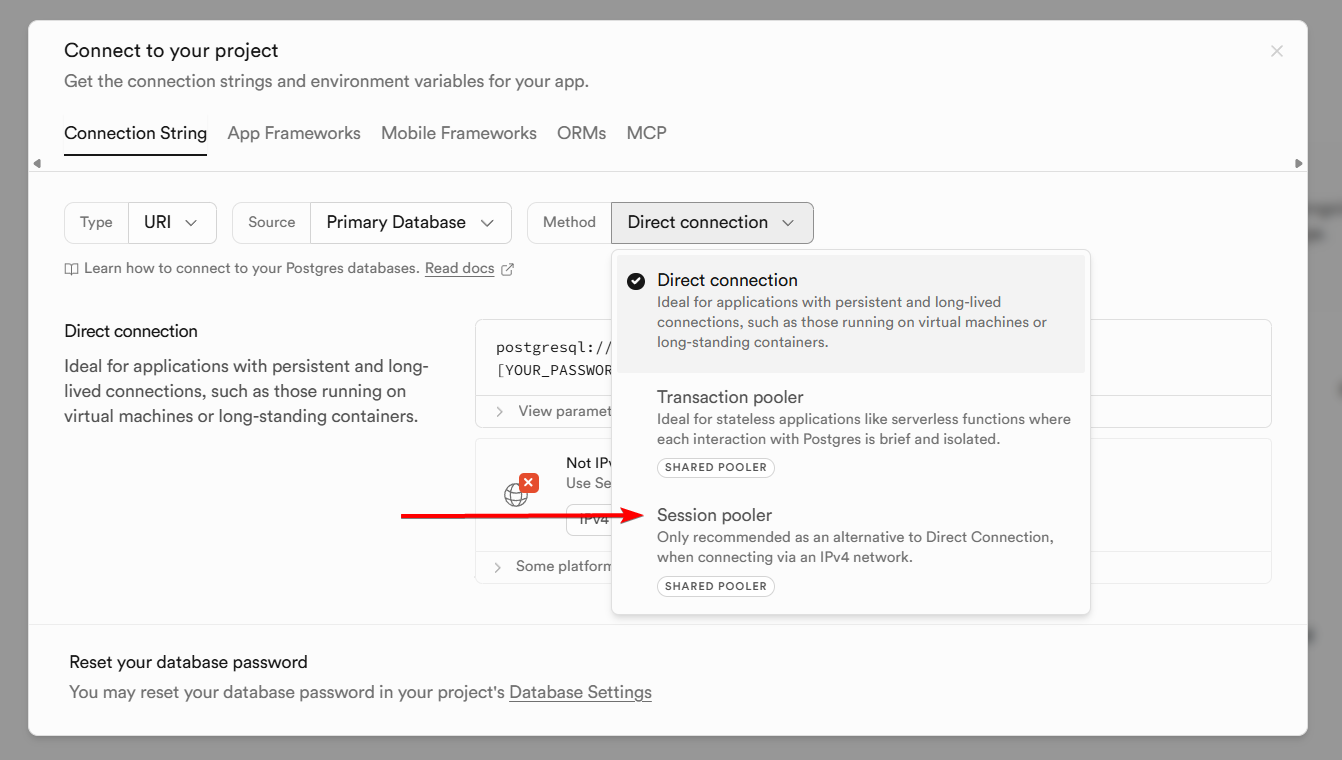
1. Find pooler connection
Navigate to your Supabase project, go to Project Settings → Database. Scroll down to the Connection string section and select Session pooler mode.
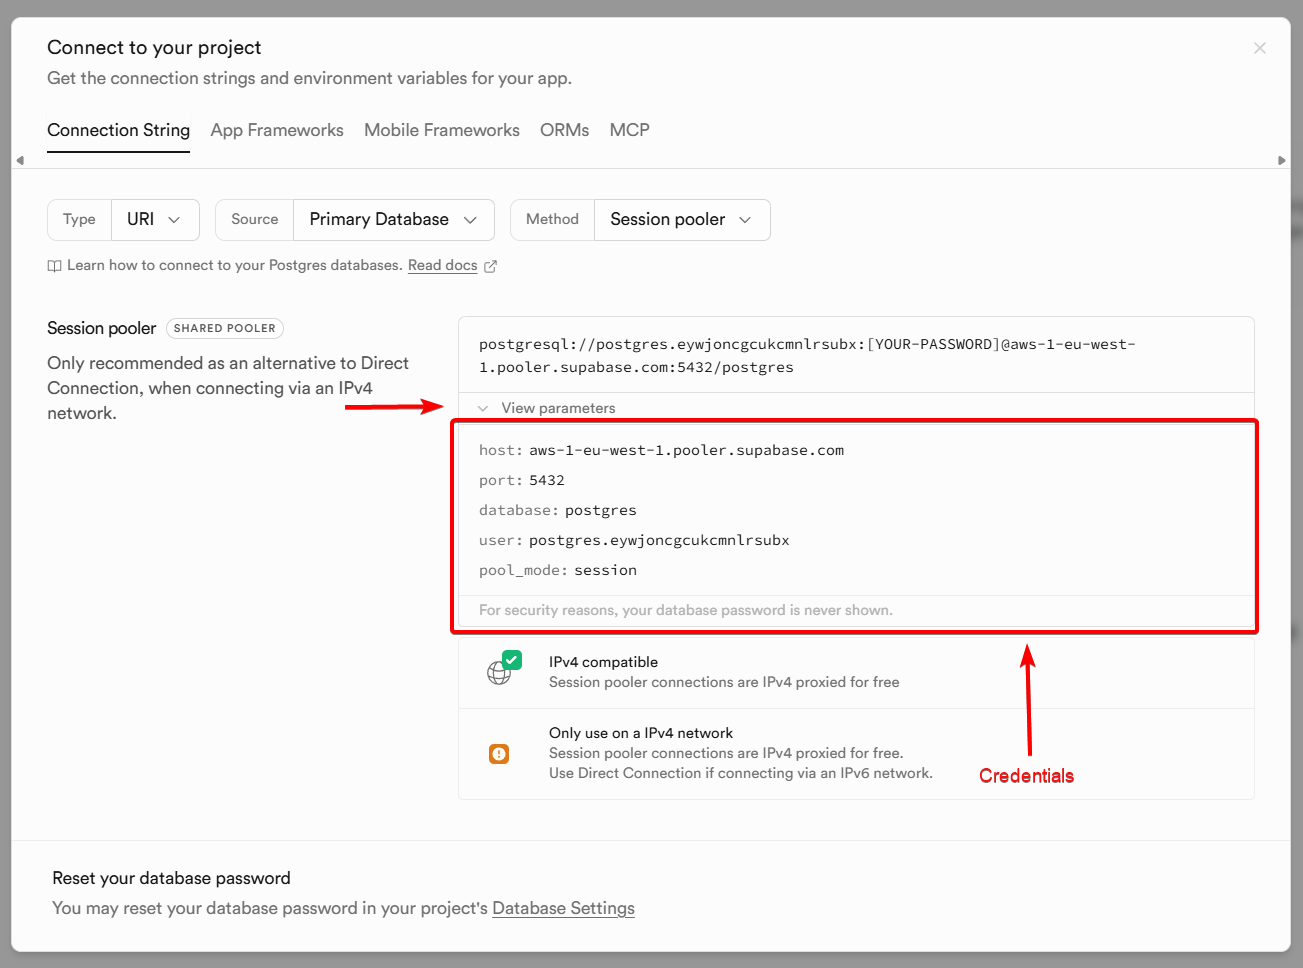
2. Copy connection details
Copy connection details and use them in Postgresus when adding your database. See screenshot to differ connection details.
Option 2: Purchase IPv4 Add-on
Supabase offers a paid IPv4 add-on that provides a dedicated IPv4 address for your database. This option gives you a direct connection without going through the connection pooler.
To enable this option:
- Go to your Supabase project dashboard
- Navigate to Project Settings → Add-ons
- Enable the IPv4 add-on
- Use the direct database connection details in Postgresus
💡 Tip: For most use cases, the free Session Pooler with IPv4 option works perfectly for backups. The paid IPv4 add-on is only necessary if you need a direct connection for other reasons.
Default schema limitation
By default, Postgresus backs up only the public schema when working with Supabase databases. This is because Supabase restricts access to other schemas (such as auth, storage, and realtime) for security reasons.
ℹ️ Note: The public schema contains your application data and custom tables. Supabase-managed schemas like auth and storage are protected and managed by Supabase itself.